


Starting from complete scratch when furnishing a vacation rental is overwhelming to say the least, here’s an inside look at how I designed each room.
As soon as our offer was accepted on our Tahoe Vacation Rental, the Tahoe Bear Den, I started on my DIY interior design process. We had to furnish 4 bedrooms, 2 bathrooms, 2 living areas, a dining room and kitchen – all within the first month of owning the property so we could get it listed for rent for the holidays. Sounds like a massive task right?
How I designed our Tahoe Vacation Rental
- Gather photos of each room as it exists today
- Decide on the home design vibe with an inspiration board
- Curate inspiration photos specifically for each room
- Create a Slide deck to put all your ideas in one place
- Add images of items you're envisioning in each room, play around with paint color and wall textures
- Select your projects and purchases
Step 1: Gather photos of each room as it exists today
I took the nice wide angled photos from the MLS listing to build my room design on top of.
Step 2: Decide on the home design vibe with an inspiration board
I’d been collecting photos in my Saved folders for a while on Instagram. I come across them by following some great interior designers. Here are some of my favorite accounts:
- @ChrisLovesJulia
- @StudioMcgee
- @beckiowens
- @amberinteriors
- @katemarkerinteriors
- @kelseyleighdesignco
- @Houseofjadeinteriors
- @lindsay_hill_interiors
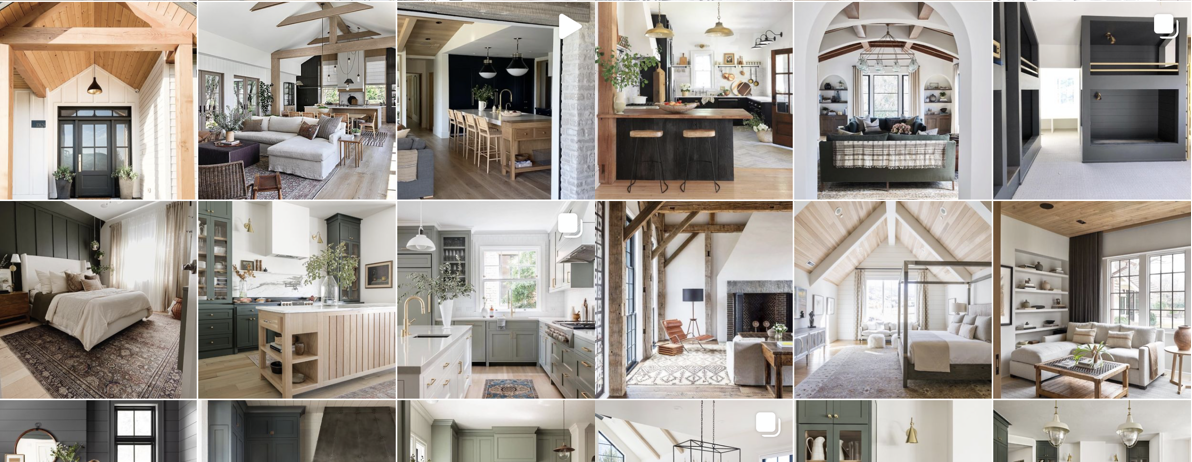
My inspiration photo collection looked a little like this:


Step 3: Curate inspiration photos specifically for each room
As you can see, the design aesthetic I landed on was a combination of rustic cabin and modern mountain vibes. I wanted to incorporate lots of wood, muted colors, and a variety of metals to create a cozy environment.
I pulled photos out of my initial large collection and assigned them to each room.
Step 4: Create a Slide deck to put all your ideas in one place
This is how I stayed organized. I created one deck for downstairs and one deck for upstairs, had sections for each room to add these final inspiration photos.
Example of the final inspiration for our Queen Room:

Inspiration photos from Studio McGee & Chris Loves Julia
Step 5: Add images of items you’re envisioning in each room, play around with paint color and wall textures
Create a new slide for every look, swapping out products until the room feels just right.
Example of product options for our Queen Room:


Step 6: Select your projects & purchases
Some rooms were tougher than others. For our upstairs family room I think I cycled through over 30 rugs until I found the one that felt just right.
Our Queen Room landed on this final design:

For live behind the scenes of how I designed our Tahoe vacation rental with pictures and video of our renovation, follow me on Instagram @newmodernmom.
And if you'd like to see it for yourself, enjoy a stay at Tahoe Bear Den!


